
Create a Managed Plan Analysis
Learn how to create an analysis with a managed plan in a project.
Overview
With managed plans, you can easily connect plan data to create analyses and build custom guidebooks. Creating analyses with managed plans allows you to consistently monitor different plans and plan scenarios. Any security you have configured for the managed plan will apply to the analyses you create and users will only see plan data at the level of visibility they have been granted.
Prerequisites
You must first Create a Managed Plan before you can create a managed plan analysis.
Step One: Trigger plan creation in the project
Open the managed plan in preview to trigger creation of the plan in the project:
- In a project, on the navigation bar, click Preview solution.
- On the navigation bar, click the Plans room.
- In the Plans room, click the name of the plan to open it.
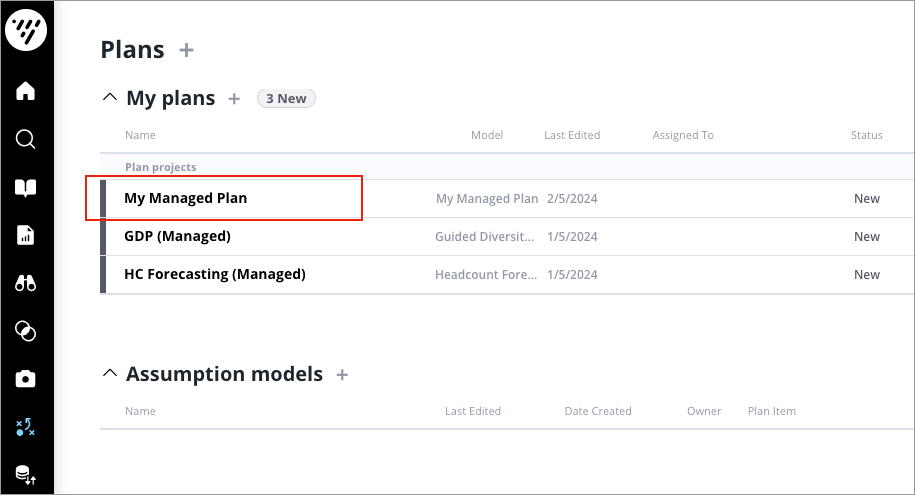
- Close the plan.
Result: You will now be able to select the managed plan and scenarios for plan metrics when you are creating an analysis.
Step Two: Create an analysis in a project
- In a project, on the navigation bar, click Model > Analyses.
- In the Analyses room, click Create Analysis.
- In the Create analysis dialog, type a display name and description for the analysis, and then click Create.
Step Three: Add plan metrics to analysis charts
In the Analysis Editor, add plan metrics from your managed plan to charts. In this example, let's say you created a managed plan using the Headcount Forecasting planning model named My Managed Plan, and you created a scenario in that plan called Basic.
- In the analysis, click the Insert button
 > Add a chart button
  .
. - Click Create new chart.
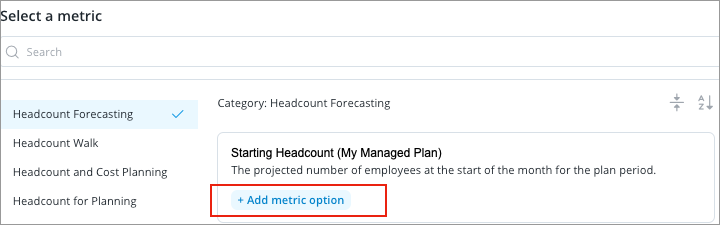
- Add a plan metric:
- In the visual title, click the Metric picker.
- Click See all metrics.
- In the Categories pane, select the planning model you used to create the managed plan. In this example, select Headcount Forecasting.
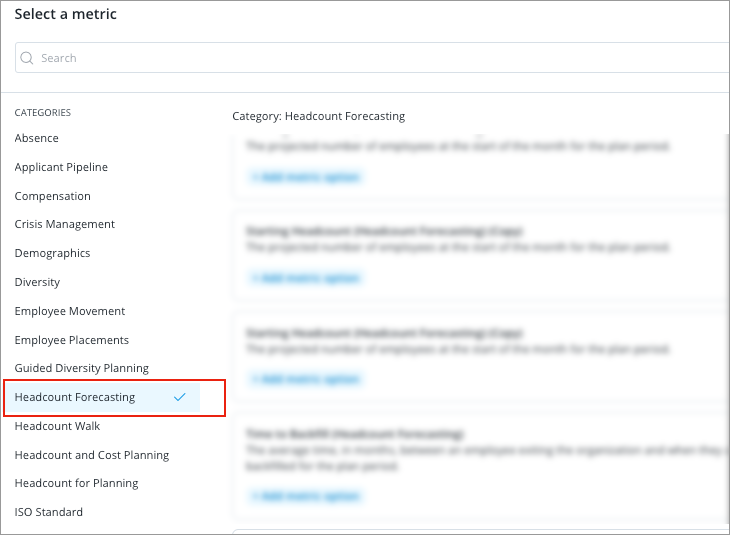
- Select a plan metric from the managed plan and click Add metric option.
- In the Metric options dialog, select the managed plan and scenario.
Note: Only scenarios created in Studio can be used to create analysis charts.
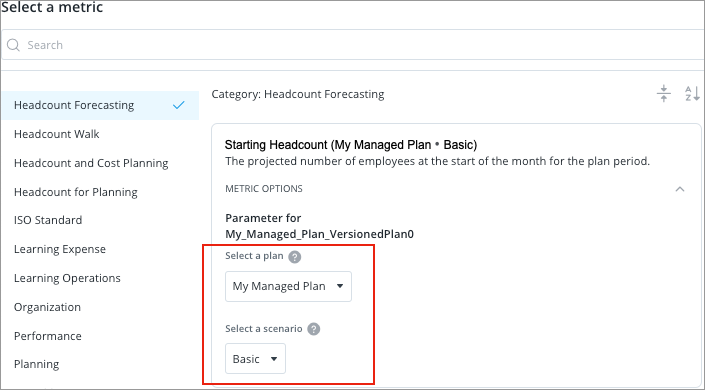
- Click Apply.
- Add or modify the filters for the chart. For more information about authoring an analysis, see Create an Analysis.
- Click Save and Close.
- Repeat steps 1 to 3 as necessary to build your analysis.
- Click Done editing.
Step Four: Create a guidebook
Once you have built your analyses, you can get them to appear in a custom guidebook by following the steps in Create a Guidebook.
Step Five: Publish your project
When finished, publish your project to production. For instructions, see Publish Project Changes.
Note: Once the project is published, the analysis will appear in the selected guidebook for all users who have been given permissions to the managed plan.